Link to URL/File
Use the Link to URL/File option to create a live link to files that are saved locally or online. Key features include:
- Link to CSV or text file formats
- Link to datasets in a JSON format
- Link to subsets of larger datasets
- Option to add a timed reload of data
- Option to save column content for offline use
- Reorder columns without changing the source data
Overview
Linked columns of data are organized in groups similar to a Column group.
Link Object
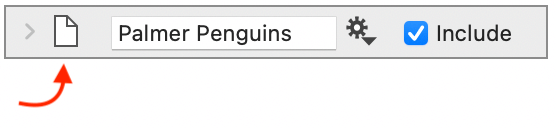
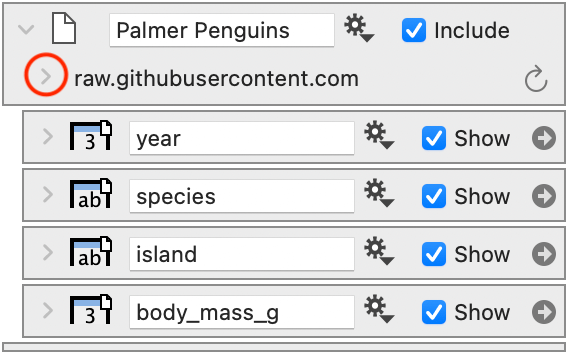
You can recognize a group of linked columns by the file icon on the left of the group object.
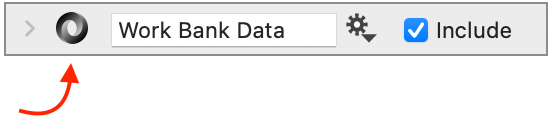
The icon will change when a link is made to JSON data. For examples using the JSON format, see the webpage on JSON.
Linked Columns
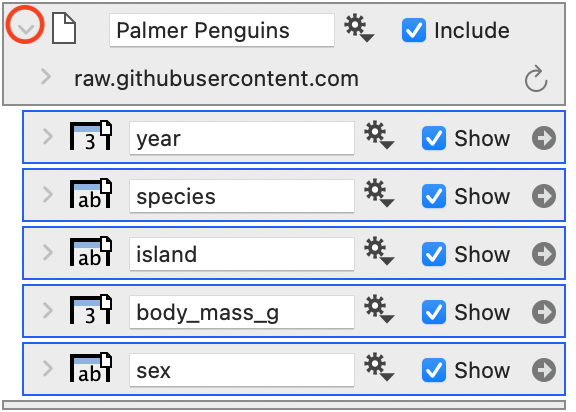
Click the left side of the object to expand the group. Each linked column will have a column object. For example, this group contains five linked columns.
Actions that work for standard columns of imported or entered data (e.g., Number, Text, Dates) also work for linked columns including:
- To Delete: Select the column object and click the delete key.
- To Reorder: Click and drag the objects from the column list or data table.
- To Hide/Show: Click the show check box.
- To Highlight: Click the grey arrow on the object’s right side.
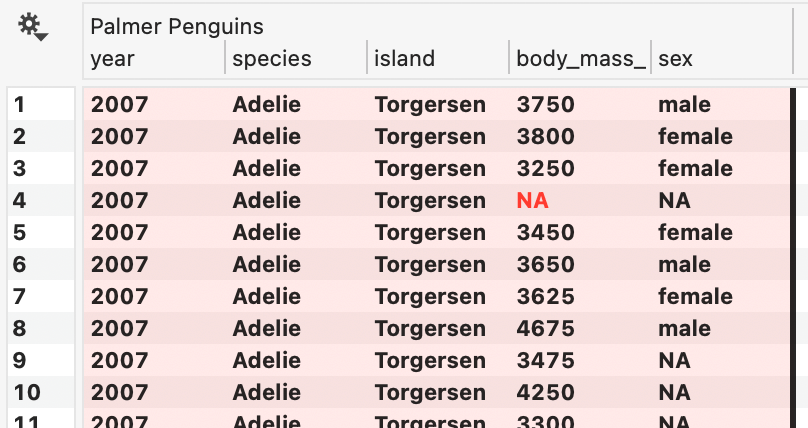
When the columns are shown in the data table, the entries are in bold to indicate that they are not editable.
Source Data
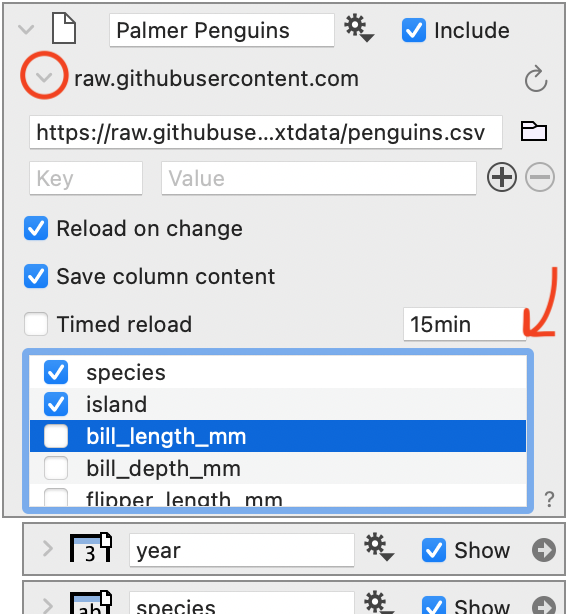
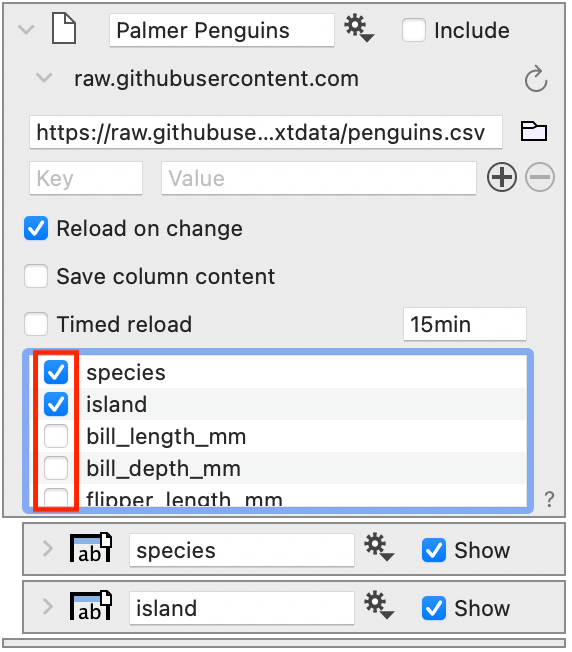
Expand the object again to view further options and a scrollable list of all the columns in the source data. Use the boxes to the left of the column names to select columns to link.
NOTE: When you delete a linked column object, you are not changing the source data file. You are only removing the linked column from your DataGraph file.
Calculations
Data in linked columns can be used in mathematical expressions. For example, an Expression column has been added to the linked group, and a linked column name is used in the expression.
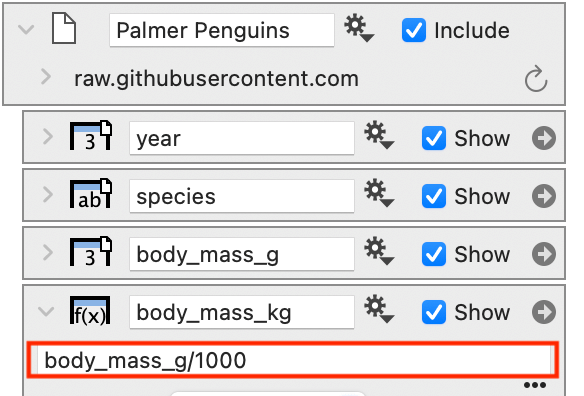
IMPORTANT: Although you can add other column types in a linked group, such as Expression columns, the linked columns must remain in the linked object group to connect properly to the source data file.
How to Link a File
You can create a link to a file by:
- using drag and drop from a browser,
- using the file manager to select a local file or
- manually entering the file location (online or local).
The examples below use the Palmer Penguins Dataset. Use the following URL to replicate the examples below for the CSV file format. This dataset is used in the documentation for the Box command.
https://raw.githubusercontent.com/allisonhorst/palmerpenguins/main/inst/extdata/penguins.csvOnline Files
The fastest way to link to an online file is to drag and drop a URL from a browser onto the data side panel. This will automatically set up and display all the data columns. Watch the following video for a demonstration.
Local Files
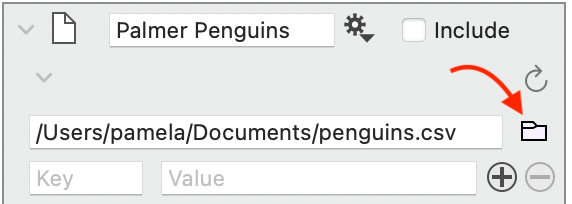
Create the link object from the ‘Other’ menu. Use the Finder shortcut to populate the file path or type it in directly. Add columns with the source data list, or use the gear menu on the object and select ‘Create missing columns’ to link all the columns in the data set.
Path Names
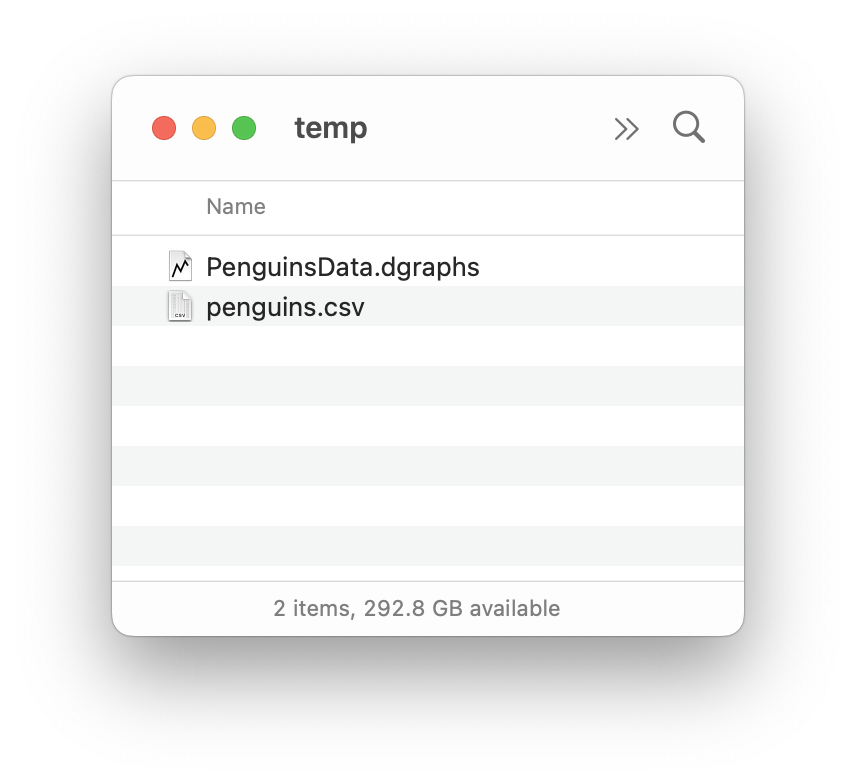
The above example uses an absolute path name, where all the folder locations are specified.
/Users/pamela/Documents/temp/penguins.csvPath names can also be specified as relative, making sharing DataGraph files that use linked data easier to share and move between computers.
DataGraph file in the same folder as the data. Use a ‘.’ before a forward slash, followed by the file’s name.
./penguins.csv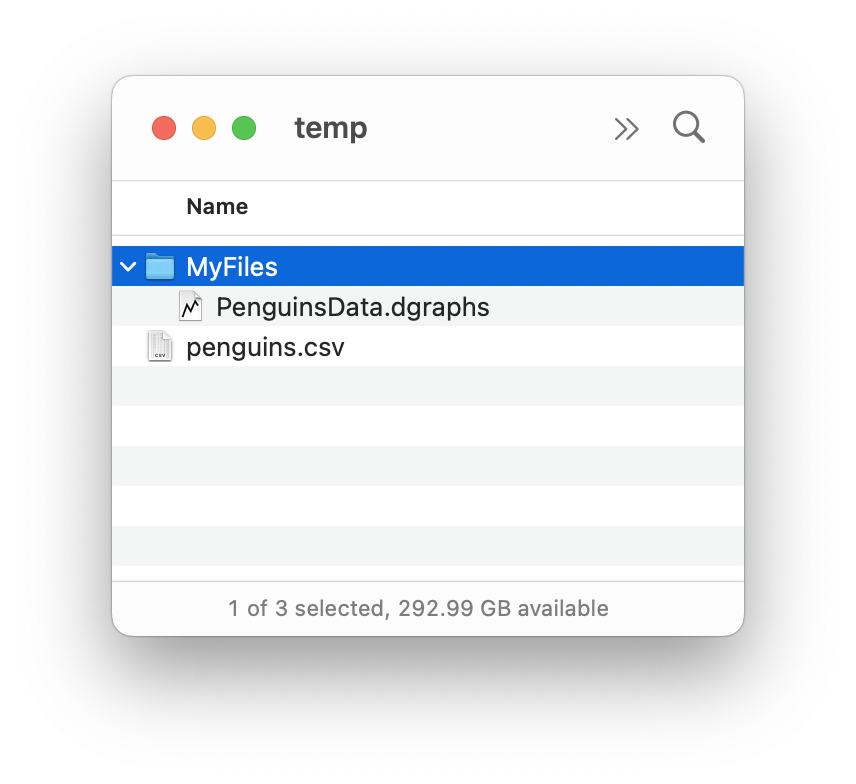
Data is located in one folder above in the parent directory. Use a ‘..’ before a forward slash, followed by the file’s name.
../penguins.csv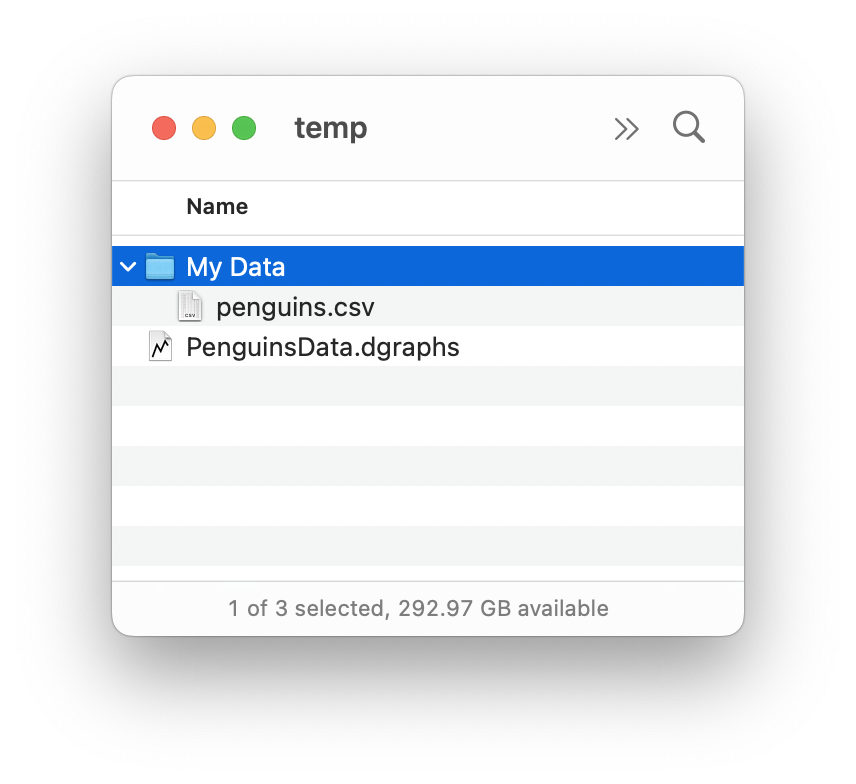
Data is nested in a folder. Note there is no problem with spaces in the names.
./My Data/penguins.csvYou can also use ~ to indicate your home directory. For example, if the data was in your Documents folder.
~/Documents/penguins.csvStep-by-Step Instructions
File links can be added manually for either local or online data sources.
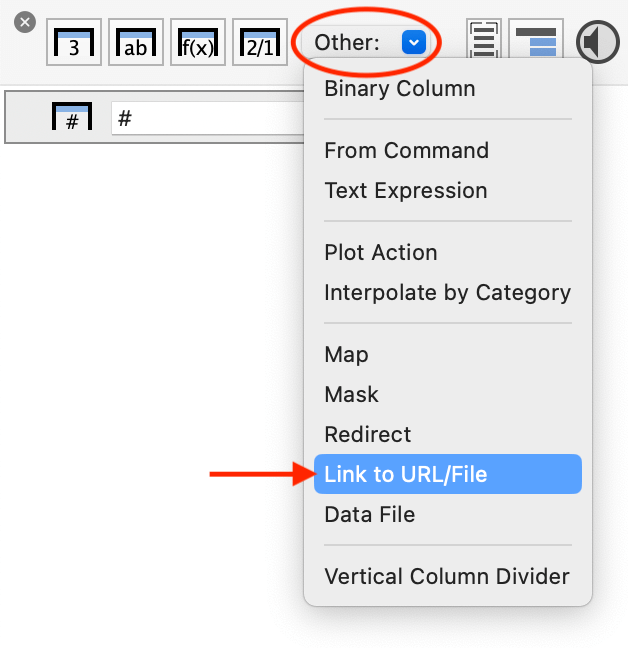
STEP 1: Click the Other drop-down menu and select the Link to URL/File option.
This creates the file link object. Like a column group, the link object is used to show and manage all the data from the linked file.
STEP 2: Click to expand the inner section of the object.

STEP 3: Enter the URL or local file location. If the file is read properly, the list of columns will be populated below.
To link an online file, enter the URL.
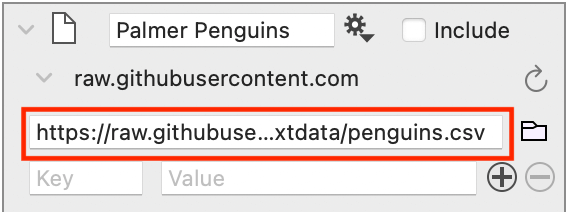
To link a local file, enter the location directly or click the file icon to select a file from the Finder.
STEP 4: Add linked columns.
To add one column at a time, use the check marks.
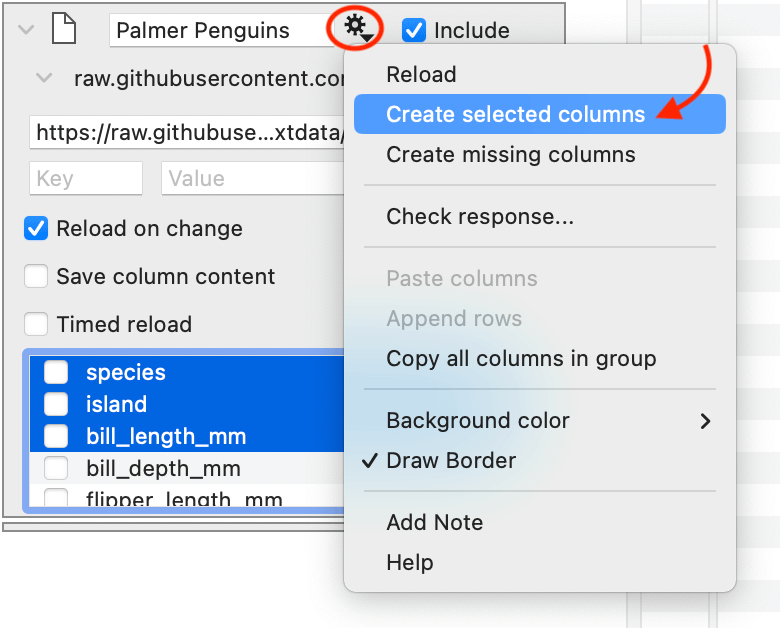
To add a group of columns, highlight the columns and select Create selected columns from the gear menu.
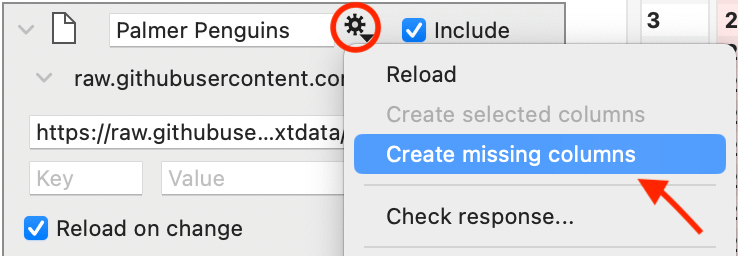
To add all columns, select Create missing columns from the gear menu.
Step 5: Check the Data Type
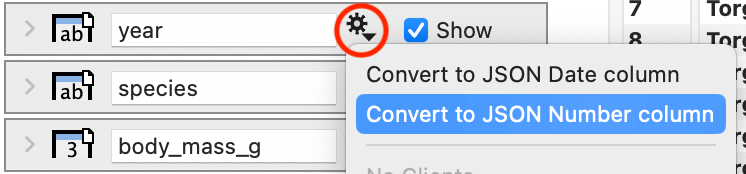
When you link data, DataGraph assesses the entries in each column and assigns the column to either a Number, Text, or Date. The icon indicates the data type.
If the assigned type is incorrect, click the gear menu to change the type. This does not change the data, only how the entries are interpreted.
Step 6: When you have all the data columns set up, you can collapse the inner section of the group.
Options
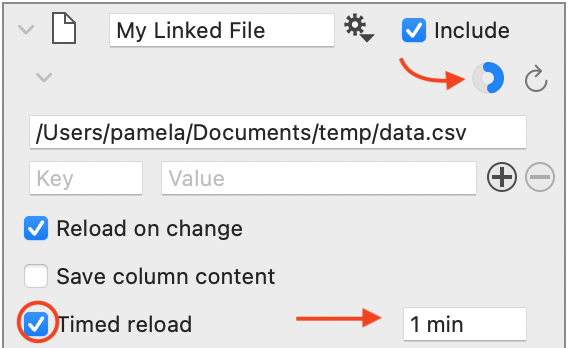
By default, the data is not saved in your DataGraph file. The data is reloaded when you first enter the file location, change the location, or open a file. You can force a reload of the data at any time by clicking the reload symbol shown here.

If the object is collapsed, you can reload from the gear menu.

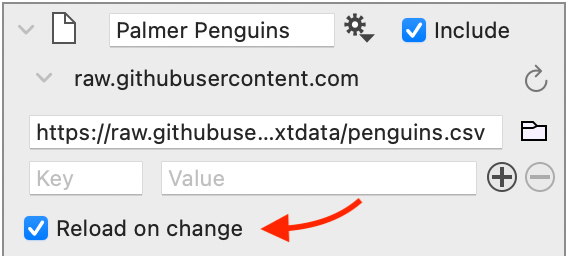
Reload on Change
Click this button to force a reload when the path name is edited. This is checked by default.
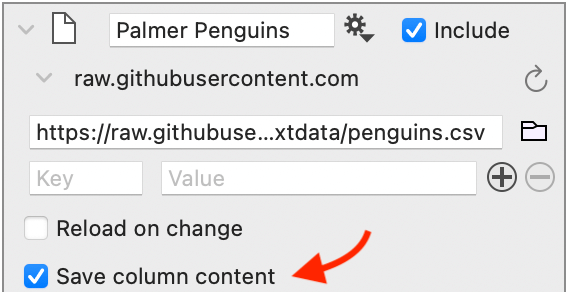
Save Column Content
If you check ‘Save column content,’ the data is saved with the file. Thus, a reload will not occur when you open a file, and the data will be available when you are offline. This is NOT checked by default.
Timed Reload
Check this button to have the data reloaded/refreshed on a regular time increment. You can also specify the time increment in the following units:
- min
- hour
- day
- week
When you have a timed reload, you will see a progress indicator in the top right corner. When this completes the circle, the data will be reloaded.