Connect
The Connect command is a basic drawing command similar to the Lines command. It allows you to quickly draw one or multiple lines from specified x and y coordinate locations.
The Connect command is deceptively simple: It allows you to draw a straight line between x and y locations. Once you master this command, you can quickly draw complicated patterns, varying the color and line width based on your data.
One Line
Draw a single line between two x.y locations. Simply type in the coordinates as a number or a variable.


Multiple Lines
You can combine specifying coordinate locations directly with data columns. Here, the values for X1 and X2 are entered directly, but Y1 and Y2 are coming from columns.


Because there are four rows in the data table, the command draws four lines.
Line style
The Line style options allow you to customize how all lines are drawn from a given command. You can change the line from a solid line to a variety of dashed line types. You can also use the color tile to change the color of all the lines and the slider to change the line width for all lines at once.

Line Width
You can vary the Line width for each line by using a column in the data table. The values in the column are multiplied by the Scale to get the line width in pixels. This overrides the line width in the Line style above.

Line Color
The Line Color options allow you to vary the line color for each line based on data using a Color scheme or Color ramp. This overrides the line color from the Line style.

Labels
Near the bottom of the command you can specify a label. You can type in the label here directly in the text box shown below.

When the Line Type is Straight, you can vary the Label Position. With Curved and Stepped lines, the labels will always be at the start.
Line type
By default, the line is drawn straight between the x,y coordinates. The Line type menu gives you a lot of options for how the points are connected. Choose from ‘Steps, ‘Curved’, or ‘Straight’.

To the right of the Line type menu other options will be available that depend on the type chosen. For example, curved lines have a Style menu for changing the direction of the curve (i.e., X or Y). Stepped lines have several options for how the step is oriented. These options are illustrated below.
End caps
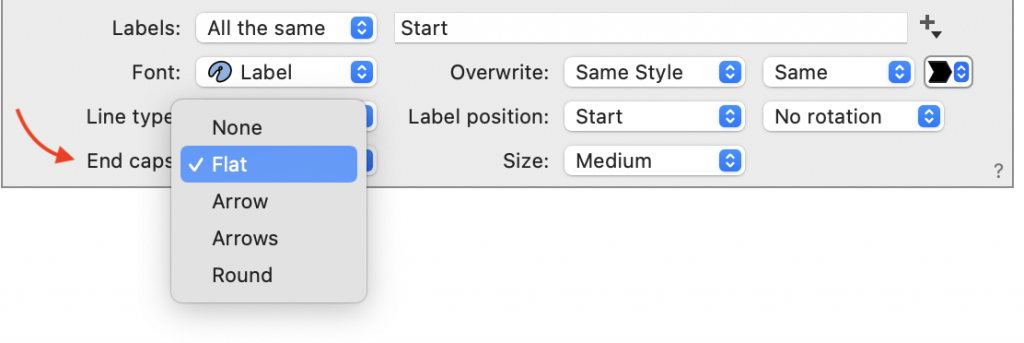
By default, the connect command draws a line with nothing at the ends, but at the bottom of the command is the End caps menu. Choose from a variety of end-cap styles or select ‘Round’ to soften the edges when the line thickness is increased.
