Simple Group
Summary
This tutorial will walk you through a very simple example of how to use a program written in C++ to perform a calculation. Takes in a single argument and returns a group of variables. The computation is done in Xcode. This document walks you through every step in detail.
Demo Video
Click the following link to watch a video demo: https://community.visualdatatools.com/it/movies/simplegroup.mp4
Create the Group variable
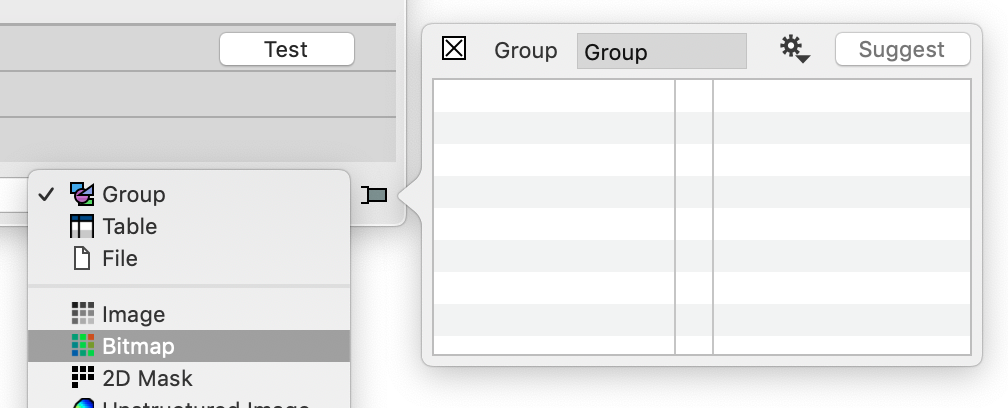
The first step is to create the group variable. Click the Task icon for list of options.
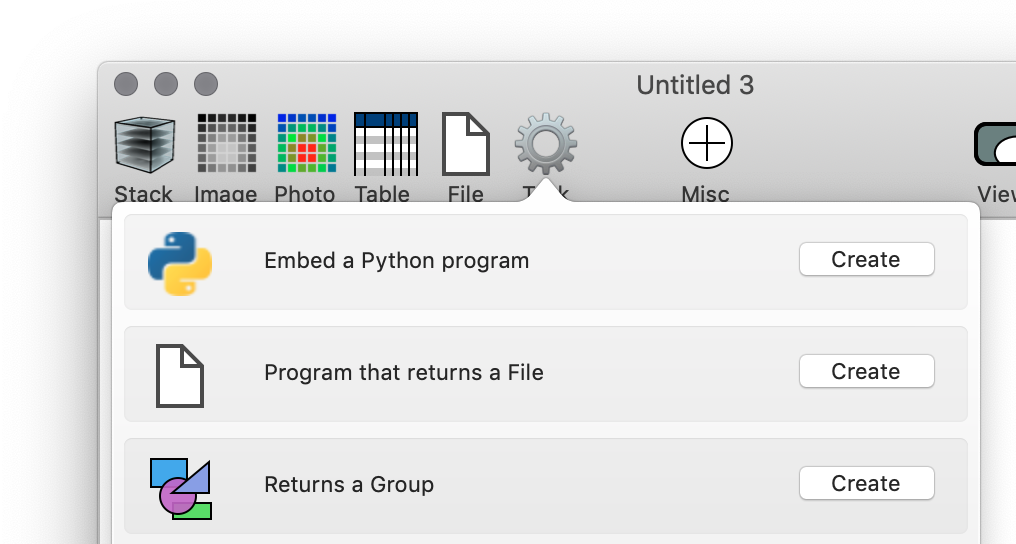
Click on the create button next to the group entry.
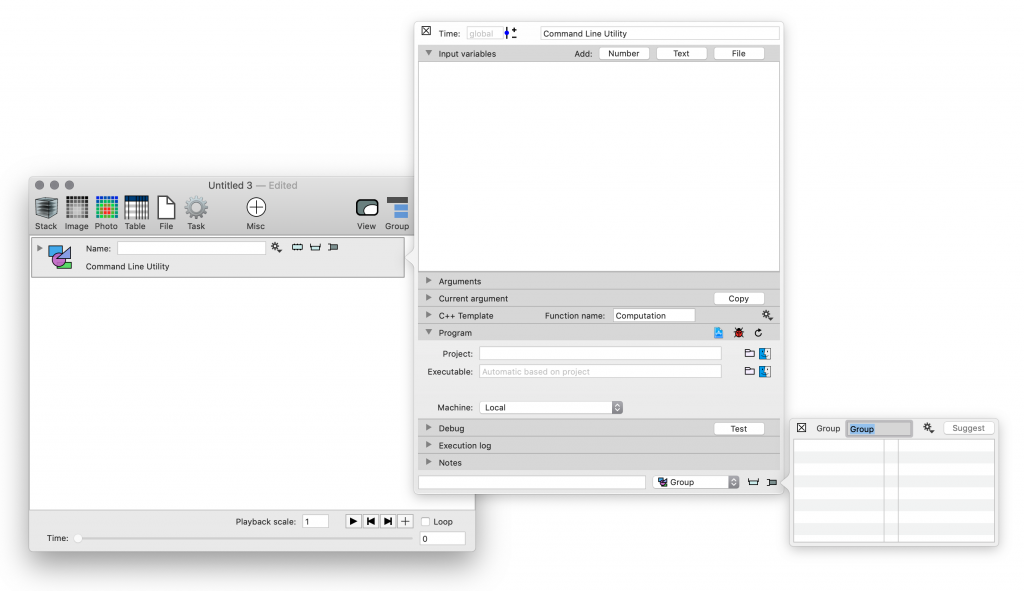
You will see a collection of windows, including the Group variable on the left and associated side bar panels on the right.
Group in Variable list
This is an object that you can refer to in other variables or commands. The look of this object is affected by the options specified in the side bar, which has been opened automatically. You can always open the side bar up again by clicking on the button that is slightly darker in the figure below. The text “Command Line Utility” can be changed at the top of the side bar.

Side panel
The side panel is where most of the settings are specified, and is used to debug and test your program.
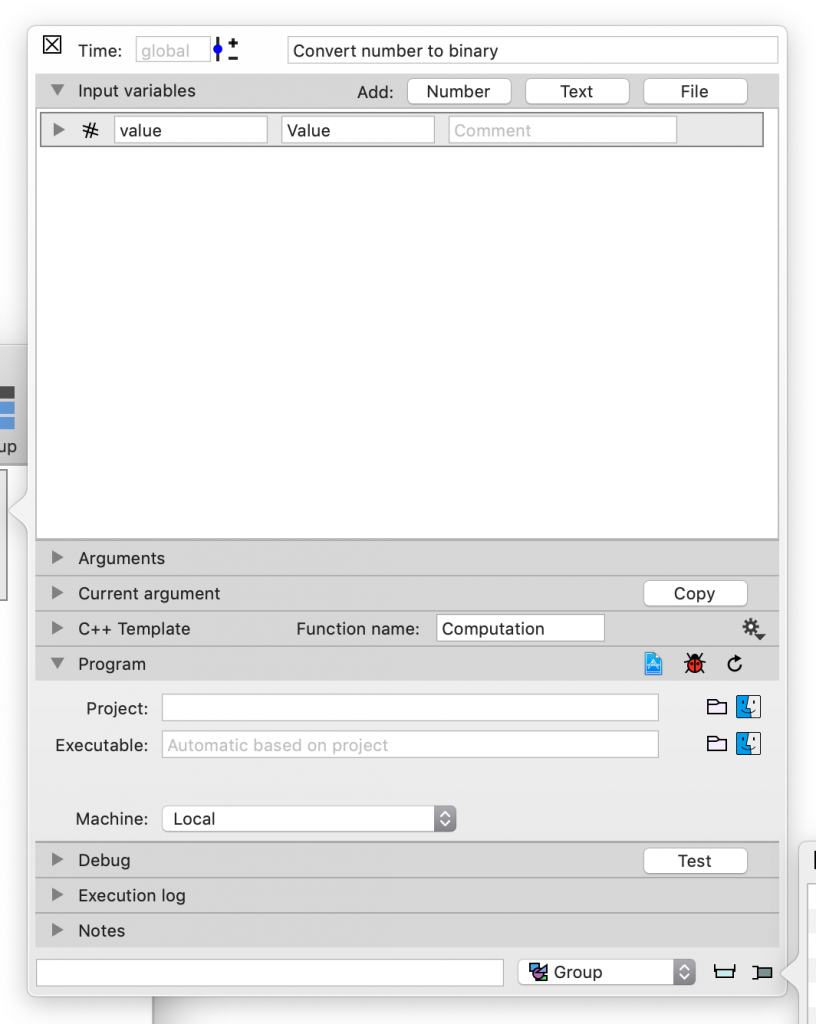
There are a number of entries here, but for now we will skip over most of them and just focus on two parts, defining the input variables, and return variables. After you set these up, it makes sense to create the Xcode project using the “Program” tab.
In the top entry, click the “Number” button to add a variable. You can also drag a variable from the workspace (first window) into the list to create a variable reference. We will not use that in this example.
After you create a variable you need to give it a name. The first name is used for the C++ code. Since this is will be used verbatim it makes sense to use lower case letters and not use spaces or numerical values. If you change this name you will need to update the source code. The second entry is the name used in the UI for the module. You can change that at any point.

If you click the top left corner of the group object, you will notice that the UI for the will update as you make the changes.

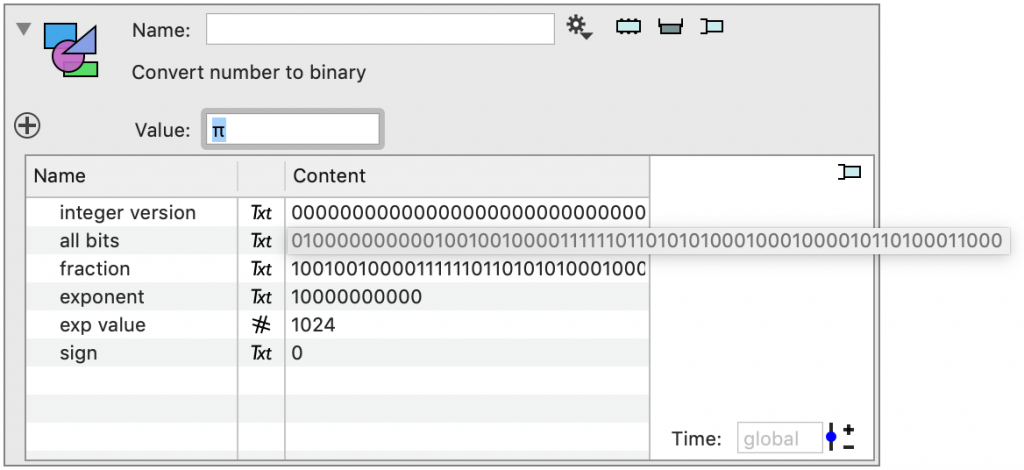
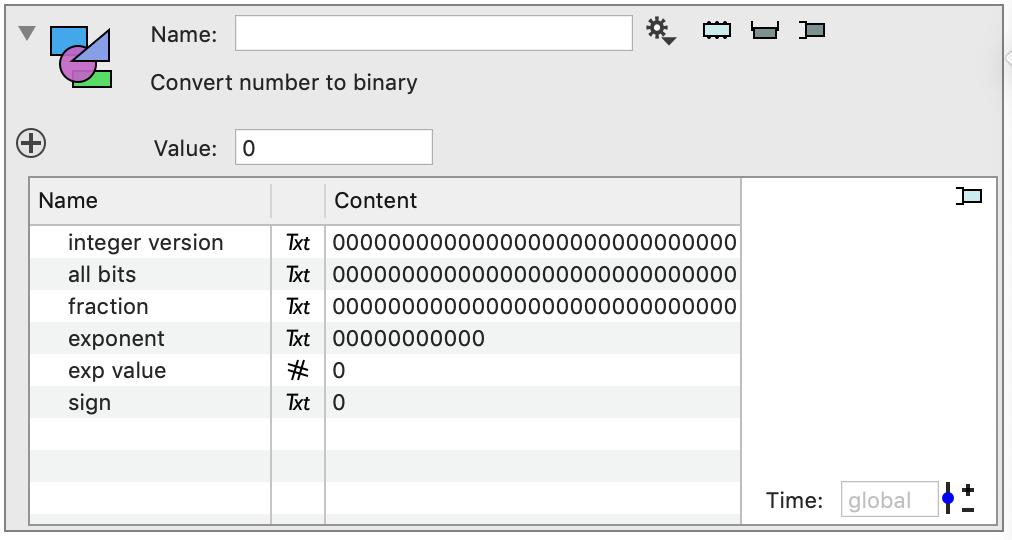
The output is defined at the bottom of the side bar. There are two aspects to this, one is the variable type, which has been pre-selected to be a Group and the other is a second side bar to specify the entries in the group.
This will create a C++ structure, so you need to specify the entries here. This is done by using the small gear menu at the top. The return group variables are as follows: integer version, all bits, fraction, exponent, exp value, and sign.

Create the Xcode project
If this is the first time you use this, you need to set up a folder for your Xcode projects. This is done since the Xcode project is not going to be a part of this file. This makes it also easier to share Xcode projects between multiple ImageTank files. Go into the Preference panel (ImageTank menu) and click on the “Add…” button. Add a folder for your projects.

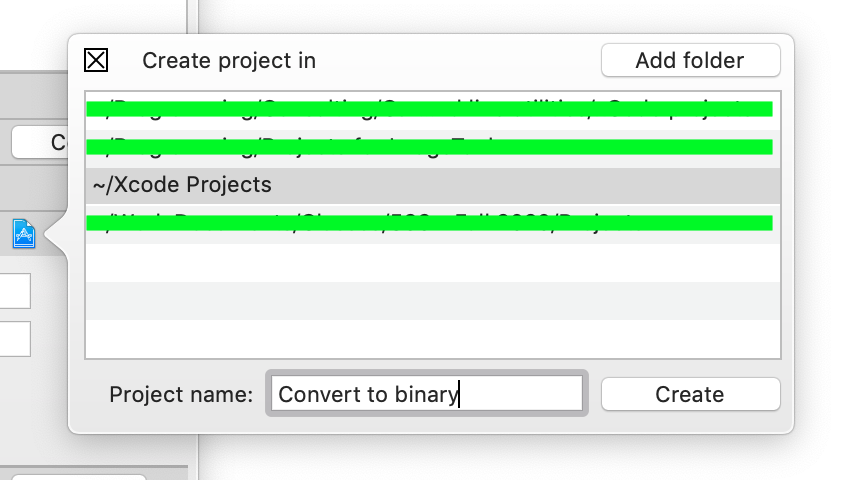
Once you have a folder, click on the Xcode file icon in the Program tab. Select the folder, type in a project name and hit Create.
What happens now is that in the Program tab you will see the project name. ImageTank will use the search path to resolve this name, so you can move the Xcode project between folders later.

Note that the Xcode project will likely take over your screen, since that is automatically opened after it has been created. So let us go through what was created by this action.
Xcode Project
What is created is a folder with the name of the project and an Xcode project with the same name. The DTSource group is for a C++ library that is located inside the ImageTank application wrapper and is a cross platform library of data structures and methods to read and write those structures to files.
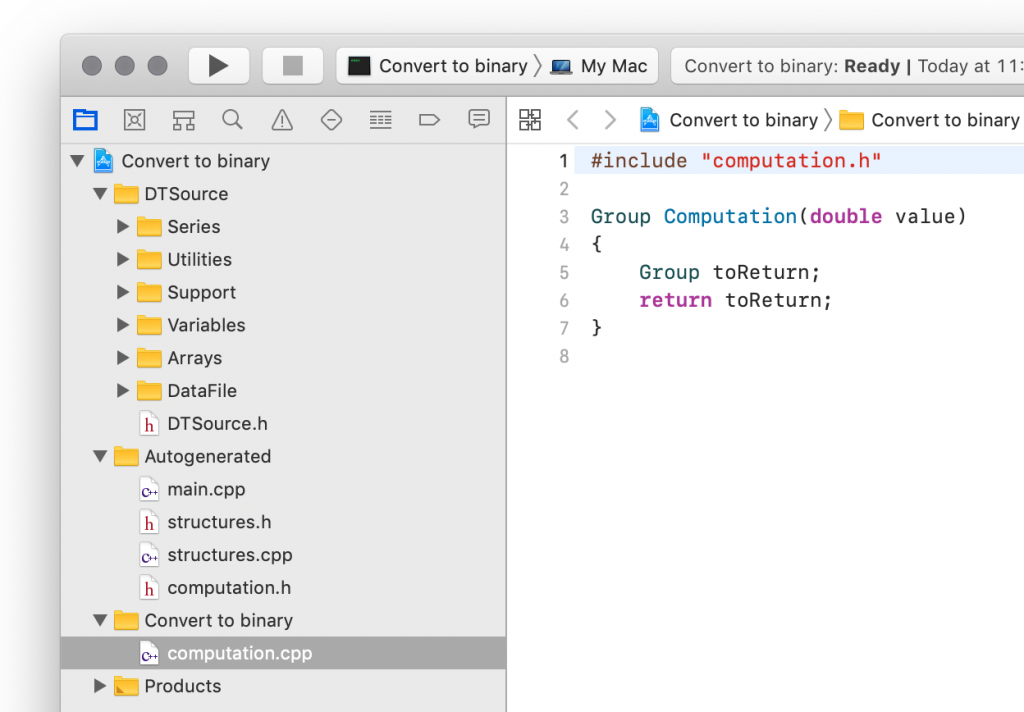
In the “Autogenerated” folder you have four source files that ImageTank creates automatically based on the input and output specifications. That leaves you just with implementing the actual computation, which is located in computation.cpp but you can change the name of that file, and where you implement the function. Editing the autogenerated files is ill advised, and if the input or output changes you use ImageTank to overwrite them for you. That is what the “C++ Template” tab is for in the side panel. All you have to do now is to overwrite the content of computation.cpp with the following text:
#include "computation.h"

 int bitNumber(unsigned char v,int b);

 int bitNumber(unsigned char v,int b)
 {
     unsigned char first = (v<<(7-b));
     unsigned char second = (first>>7);
     return (second!=0);
 }

 std::string reverseString(std::string s)
 {
     ssize_t i,len = s.length();
     std::string toReturn;
     for (i=len-1;i>=0;i--) {
         toReturn = toReturn + s[i];
     }
     return toReturn;
 }

 Group Computation(double value)
 {
     int test = int(value);
     unsigned char *bytes = (unsigned char *)&test;

     Group theGroup;

     std::string toReturn = "";
     int i,j;
     unsigned single;
     for (i=0;i<4;i++) {
         single = bytes[i];
         for (j=0;j<8;j++) {
             if (bitNumber(single,j)) {
                 toReturn = toReturn+"1";
             }
             else {
                 toReturn = toReturn+"0";
             }
         }
     }
     theGroup.integer_version = reverseString(toReturn);

     // 64 bits
     unsigned char *asBytes = (unsigned char *)(&value);
     toReturn = "";
     for (i=0;i<8;i++) {
         single = asBytes[i];
         for (j=0;j<8;j++) {
             if (bitNumber(single,j)) {
                 toReturn = toReturn+"1";
             }
             else {
                 toReturn = toReturn+"0";
             }
         }
     }

     theGroup.all_bits = reverseString(toReturn);
     theGroup.fraction = reverseString(toReturn.substr(0,52));
     theGroup.exponent = reverseString(toReturn.substr(52,11));
     theGroup.sign = reverseString(toReturn.substr(63,1));

     std::string expStr = toReturn.substr(52,11);
     int sum = 0;
     int factor = 1;
     for (i=0;i<11;i++) {
         sum += ((expStr[i]=='1') ? factor : 0);
         factor *= 2;
     }
     theGroup.exp_value = sum;

     return theGroup;
 }
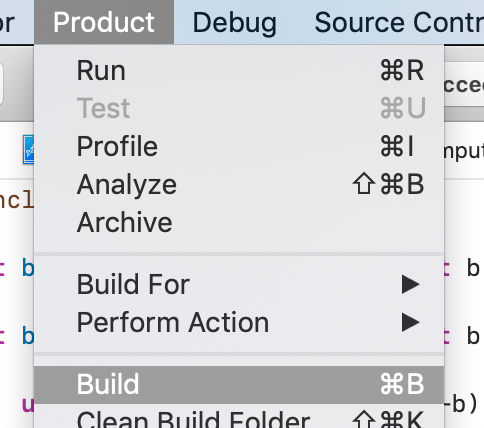
Now compile the project creating an executable.
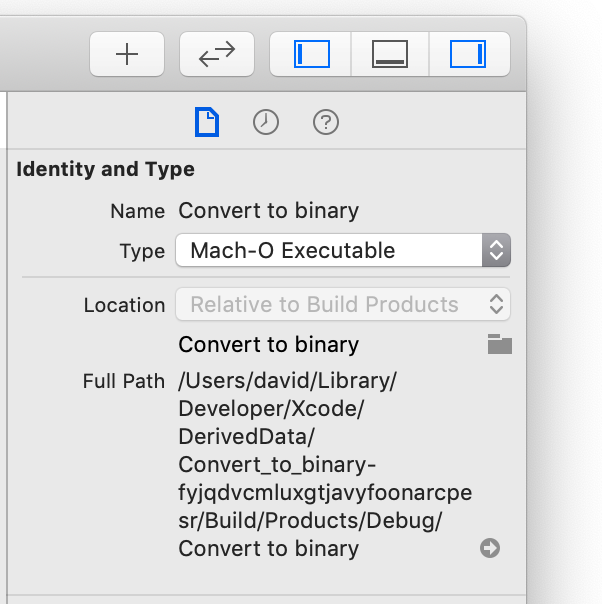
The executable is listed in the Xcode project.

If you select the executable and look at the third column in Xcode (use the toolbar) you can see the location of the executable. ImageTank looks at this location for the executable file.
Now go back into ImageTank and click on the reload button

You need to reload every time that the executable changed. Additionally you need to remove any cached results from ImageTank and recompute as necessary.
At this point you can look at the result by clicking on the monitor button to the left of the side bar button.
When you change an input value, ImageTank will go through the following steps:
- Create a temporary directory
- Put all inputs into one or more files in that directory
- Run the program. In two different modes: debug or optimized. ImageTank will pick the version that has a newer time stamp.
- Read the output from a file in that directory
- Remove the temporary directory.
In most cases you don’t need to think about these steps. The auto-generated code will open the data files, read the content in, call the computational code with the inputs as arguments and then save the result into the output file. The source is all in the Xcode project. It has no dependence on any pre-compiled library’s and the code is portable.
Debug
The debug function in ImageTank is useful for writing code.

The button on the left opens the Xcode project so you can quickly go back to Xcode. The small beetle image saves the input into the Debug folder where the executable is saved. This is where the debugger will run the program, so those files will be automatically used as input. The right button is the reload button that you press after you have re-compiled and want to see what changed. If the variable monitor is visible the program will be re-run when you press that reload button.