DataTask Action Example
This document goes into a detail of how to set up and view a DataTask. It goes through how to create a DataTask from an External Action.
To make this simple, the action doesn’t do anything complicated or time consuming. Start by downloading the ImageTank file (DataTask Action) and open it in ImageTank.
Step 1 – Create the project
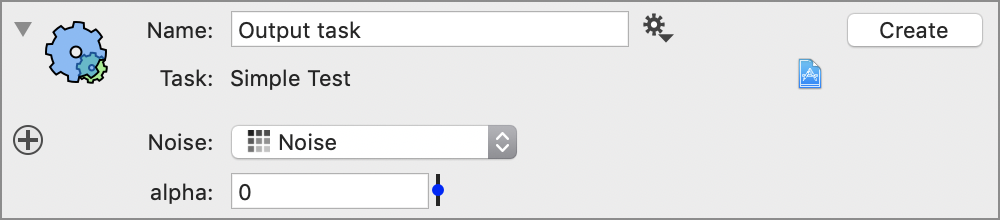
The ImageTank file includes the code needed. You have to however create the project. See the following writeup to create the project. Make sure that the Output image shows up properly. You can vary the alpha to preview the blending.
Step 2 – Create the DataTask
In the gear menu for the external action, select the top entry.

What gets created is based on the current setup for the object you had. You can open the Xcode project, but any tweaking to the argument should be done in the action.
Step 3 – Create a job collection
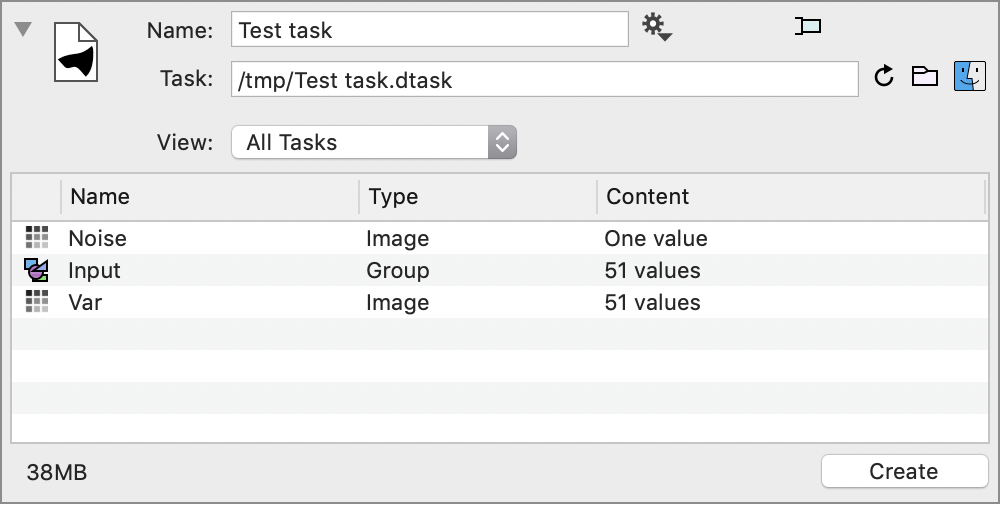
The main reason to use a DataTask for an action is when you want to run multiple instances. In the above example, if the Noise variable had a time sequence you have a collection of jobs. In here we need to vary a parameter to create a time sequence and therefore a collection of tasks. Do that by clicking on the + button in the top left corner
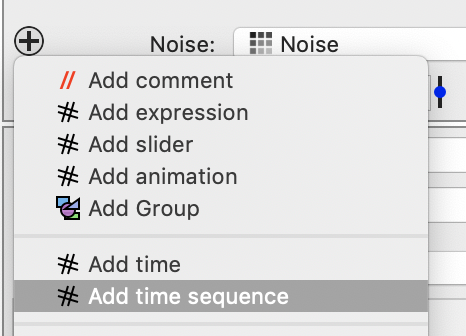
This adds a variable. Give it a name and define the time sequence. This gives you 51 different values for alpha.

Now hit the Create button and give it a name. If DataTask is already installed the file you created will be opened automatically. DataTask is included in the ImageTank disk image. Make sure you copy it from the disk image. You notice that the time values are listed here.

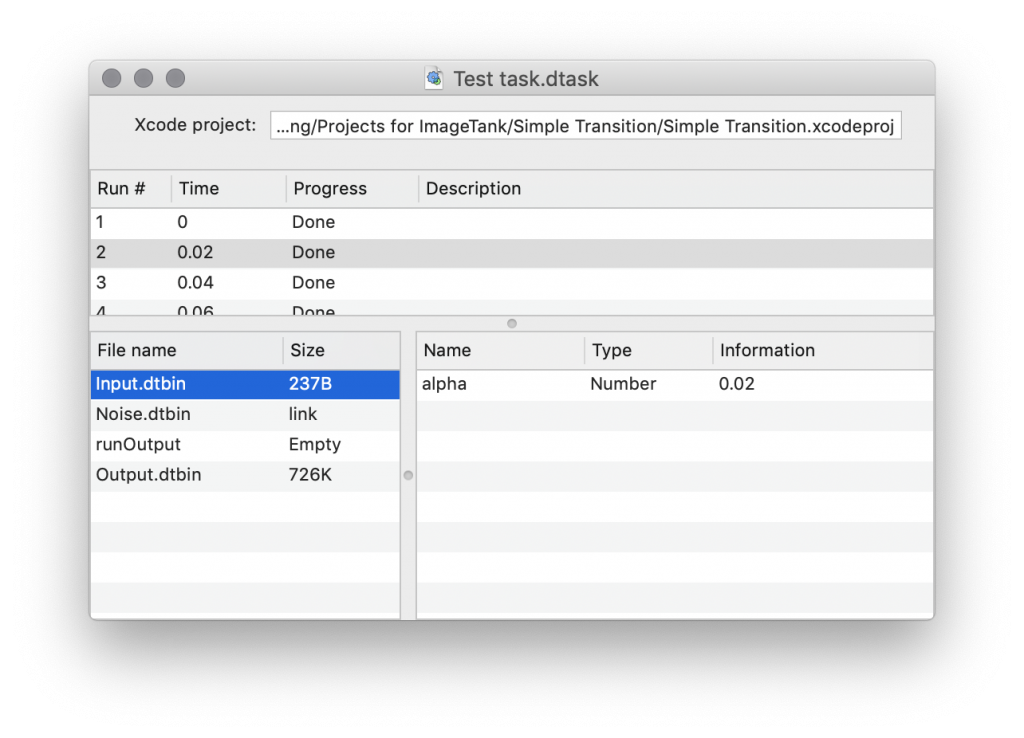
The Test task.dtask is a file package. That is, it is a folder that the Finder views as a file. Inside that folder are a number of sub folders. Each task (and there are 51 different tasks) contains all of the input needed to run each task. The executable is also included in this task file.
Step 4 – Run the task.
There are two ways to run the task, on the machine where DataTask is running, and on a remote machine.
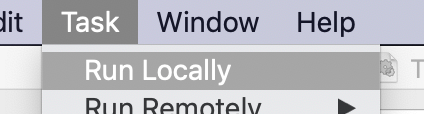
Run locally
Select “Run Locally” from the task menu
That doesn’t launch the programs, but adds to the window. Note that you have to leave DataTask running.

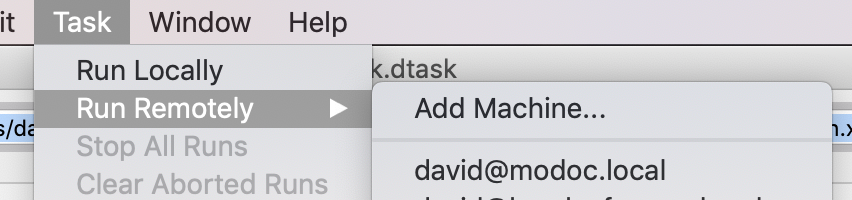
Run Remotely
For a remote machine the task is submitted to a workload manager if it is installed. This is how clusters manage tasks. Currently DataTask only supports the workload manager Slurm, but others will be added based on requests (please e-mail). If there is no supported workload manager it will start as many tasks as there are processor on that machine.
To add a machine, independent of if you have a workload manager select Add Machine… from the task menu (Run Remotely sub-menu)
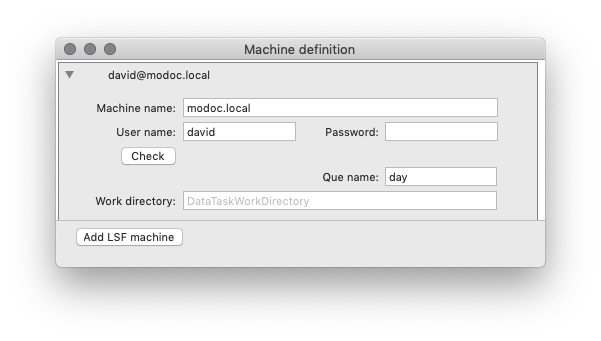
The recommended approach is to set up your remote machine so that you can ssh into it without typing in your password. If you do, you can leave the Password field blank.
After you have added a machine it will show up in the sub-menu.
What does DataTask do
When you run a program locally, the compiled executable is used to run your program. This is the executable compiled by Xcode, so to get full speed you should make sure that you compile for profiling (Build sub-menu).
When DataTask run a program on a remote machine it goes through the following steps, even if you are going to a remote Mac. Typically clusters run linux, and some dedicated compute boxes are also linux boxes. But this could be your iMac or Mac mini.
- Looks inside your Xcode project and figures out all of the source files you used to create the program.
- Creates a work directory on the remote machine specific to this DataTask file.
- Copies all of the source files over, creates a Makefile and compiles your program. Note that this step is skipped if it sees that you have already compiled this executable on the remote machine.
- Copies all of the input folders over. If you log into the remote machine, they are labeled 0,1,2,…
- If a workload manager is installed the tasks are submitted. If not, they are launched in the background. They are run concurrently but limited to the number of processors on that machine. Anything fancier such as making space for other users is why you install a workload manager.
- Starts monitoring the folder to see if any result is available. This is done periodically and any files are incrementally loaded. You can close the document and when you next open the document this will be triggered. This allows you to quit DataTask, close the file, come back later.
- When the task is finished, delete the work folder from the server. If the task never finishes, or you don’t open the DataTask application you can always log into the server and delete the work folder manually.
When Data is available
When data is available you can start viewing the result in ImageTank even though not everything is done or even while data is downloaded in DataTask. That is done by dragging the file over to ImageTank.
In the following screen shot all of the data has been computed. The run view at the bottom has been removed. You can click on each run and see all of the files in that work folder. Note that the input is in two parts, Input.dtbin includes the alpha variable and since the Noise variable is the same for every run the input is not replicated but rater saved once and then a symbolic link (alias) created in the folder. Now you have the Output.dtbin file which contains the output entry.
When you drag this file into ImageTank, and one way to do that is to drag the icon from the DataTask window, you get the following
This is presented as logically a single data file, even though you technically have 103 separate data files. The input and output are combined, which means that it is easy to see what input values were used for a given output, and you can include them in any post-processing.
Understanding Structure
To get a better image of what is saved here click on the side panel button.
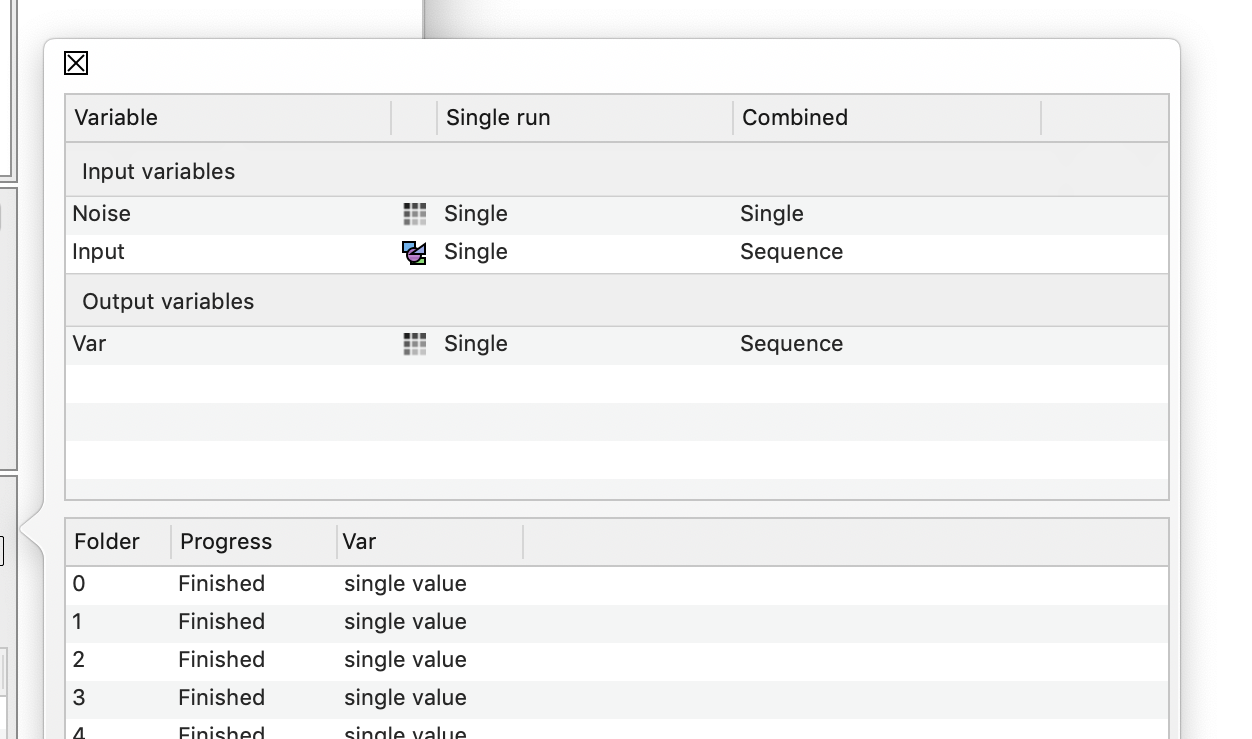
There you see what are the input and output variables. For the External Action there is only one variable returned, and that is called Var. For the External Task the output can be much bigger and include time sequences.
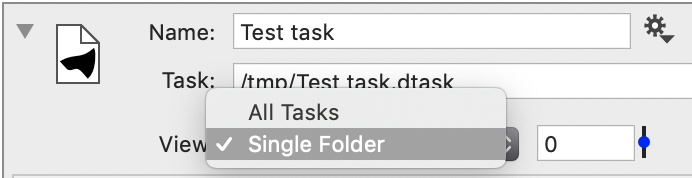
There are two ways to view the result, and that is selected in the main object. If you view all, the output is a time sequence, with the same time values as were used when creating the task file. If you specify a Single Folder you are just looking at that result. This is useful when you are viewing the output from a External Task, since each task might have a time sequence.
The side panel shows how each variable will be viewed for these options. Since the Noise variable is a constant, it is just a single value and not a time sequence.
The Input group contains all of the input variables that can’t be in a top level object. Here we only have only one variable, the alpha parameter.
The output is now available just like in a standard data file, and extracted in teh same way.