Python external program
This page goes through how to create an external program in python. Let’s go through a simple program that takes as input a file and returns a table/data frame.
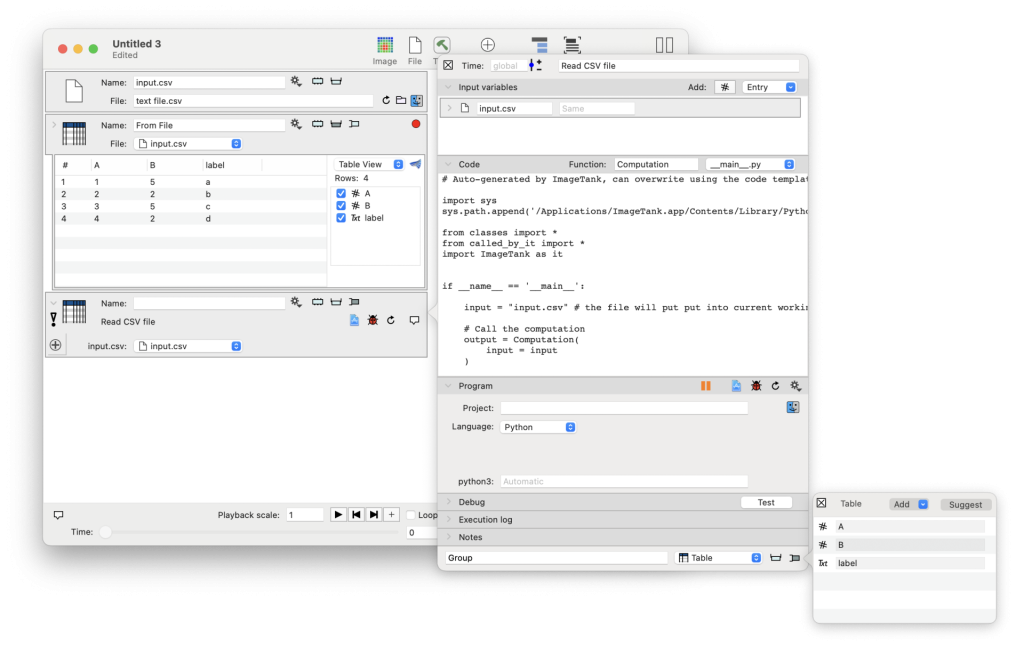
In the screenshot below a few things have happened. I dragged a “test file.csv” file into the variable list. Just to show the content of the file the next object is created using the standard parser. From that you see that there are three columns in this table, two numerical and one text. The side panel for this object was used to specify the structure that ImageTank expects. A structure of the table needs to be specified and if the input file has a different type, it is considered a run-time error (and you will see the little red dot).
The third object is created from the Task entry in the toolbar. Select the table output.
Then drag the “input.csv” file into the top entry of the side panel. That creates an input entry and adds a variable selector menu into the detail for the external project module.
The small pop up in the lower right corner is where you specify the structure of the output table. This is essentially a promisory note so that ImageTank knows what should come back from the external program. It will also be used to create the code for the starting project.
Select “Python” from the language menu. If you open the ‘Code’ tab in the side panel you can see what code is created automatically.

The auto-generated code
There are three files generated for a new project (more on where they are saved later). The first one is __main__.py. This is a special name that python looks for if you just hand in the name of the folder as an argument. This is the starting point, and you typically don’t change this manually. If the input or output changes you ask ImageTank to overwrite the auto-generated files and it will overwrite this file.
Pay attention to the sys.path… call. This adds the location of the ImageTank python library to the search path. This library is added with the ‘import ImageTank as it’ line. This assumes that ImageTank is installed in the /Applications folder. This library has no mac-specific dependency.
The file classes.py includes any data structures that have to be created, but since you are not returning a Group variable it is blank.
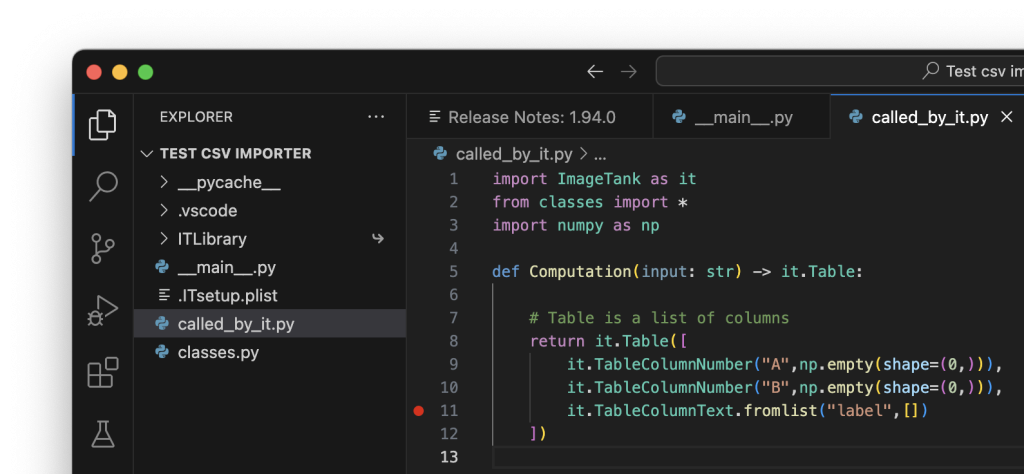
The called_by_it is the starting point of your code. ImageTank will generate a starting point, but will not overwrite it. You can however see how the content changes in the ‘Code’ panel when you change the input or output settings. You can use that to modify your code.
# Auto-generated by ImageTank, can overwrite using the code template gear menu.

import sys
sys.path.append('/Applications/ImageTank.app/Contents/Library/Python')

from classes import *
from called_by_it import *
import ImageTank as it


if __name__ == '__main__':

    input = "input.csv" # the file will put put into current working directory

    # Call the computation
    output = Computation(
        input = input
    )

    # Write output
    outputFile = it.DataFile("Output.dtbin","New")
    output.writeone(outputFile,"Var")
    # outputFile.writeindex()
Note that the ‘input’ variable is a string object that contains the name of the input file that is generated. ImageTank will use this name for the input file. Note that the file that we selected in ImageTank is named ‘text file.csv’, but that name is not used. Don’t overwrite the file, since it will point to the underlying file instead of doing a file copy.
Create your project
Now create the project. Click on the Xcode document icon. Select the folder where the project should be created. If you don’t have any folders, click on the “Add folder” button. That brings you to the preferences panel where you can create the folder. After that come back here.

This requires you to have Visual Studio Code installed on your machine. Use this link to go to the download page.
ImageTank creates a folder in the project directory that you selected. Visual Studio Code shows the content of that directory and views this as a project.

Click on the ‘called_by_it.py’ file

ImageTank set up the code needed to create the output table. This code just creates an empty table, and we need to add code to fix that. To import this, we use the pandas package. Might have to install that with “pip install pandas” on the command line. In the fourth line we import the pandas package into the called_by_it.py file. Read the data frame and convert each column into a raw array. Then put them back into the table object.
import ImageTank as it
from classes import *
import numpy as np

import pandas as pd

def Computation(input: str) -> it.Table:

    df = pd.read_csv(input) # Read the data frame

    alist = df[["A"]].to_numpy()
    blist = df[["B"]].to_numpy()
    labels = df["label"].to_numpy()

    # Table is a list of columns
    return it.Table([
        it.TableColumnNumber("A",alist),
        it.TableColumnNumber("B",blist),
        it.TableColumnText.fromlist("label",labels)
    ])
Run in ImageTank
In ImageTank open the variable monitor. You now see the content of the csv file. If you opened the variable monitor before the python code was changed you need to hit the reload button so that ImageTank will rerun the python function.

How this happened is the same as if you were using a C++ program. ImageTank goes through the following steps
- Creates a temporary folder and writes the inputs into the folder. In this case it just means the input.csv file with the content of the current time value for the file object.
- Runs the python code in this directory. Note that this directory is not the same as the directory you see in Visual Studio Code, so you won’t see the input.csv file.
- The python code creates an Output.dtbin file and quits.
- ImageTank opens the Output.dtbin file and reads the output table.
- The temporary folder is removed.
Which python is called
This is always a little tricky because of multiple instances of python. The default is that ImageTank searches for a python3 executable to run. If you haven’t installed anything fancy, it will pick up the python3 library that is installed by the system and run that. If you have multiple instances, each with exactly the right libraries installed, go to the terminal, switch to the environment you want and issue the command
which python
Copy this path and paste it into the python field.

This specifies the exact environment you want to run. Different external program modules can have different environment. The unfortunate situation here is that if you send your ImageTank to someone else they will likely have to change the path names. This is an inherent issue with multiple python instances, and suggestions for how to make this more portable are greatly appreciated. Please e-mail help@visual… with your suggestion.
Debug
Code typically takes a while to work, and rather than asking you to do that separate from your work in ImageTank, you should use the Debug facilities built in. As described above, when ImageTank runs the python program it does that outside of the project folder. Debugging however happens in that folder. Here are the steps you should go through in ImageTank and Visual Studio Code.
- In ImageTank, click on the debug icon to save input for debugging.

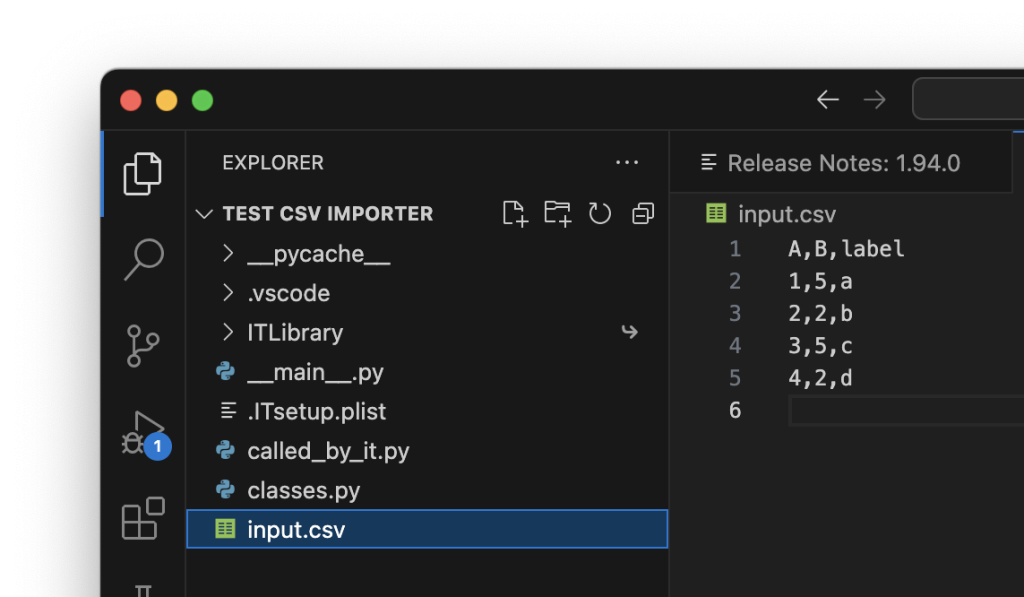
- In Visual Studio Code you will notice the input.csv file in the project folder.

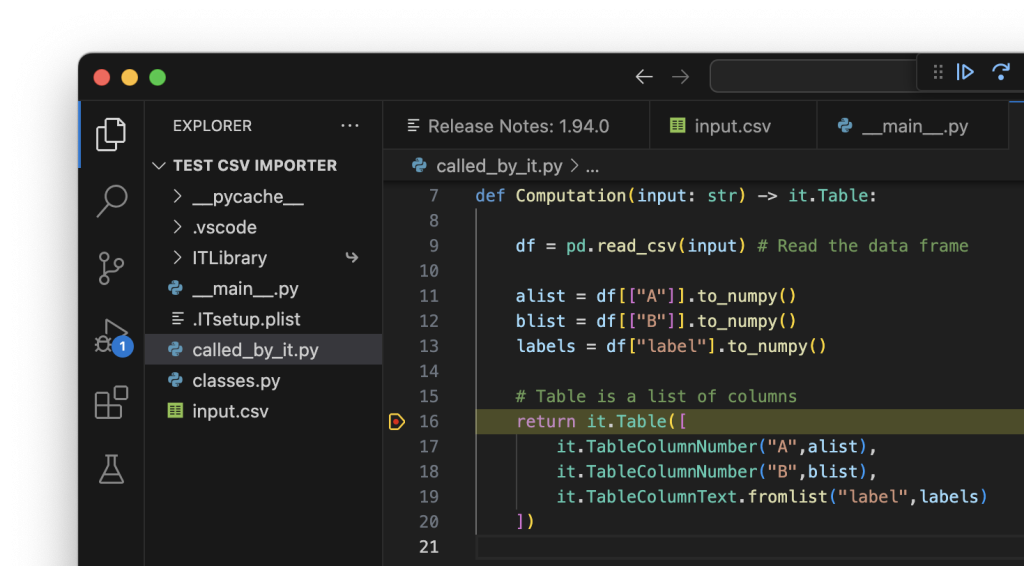
To debug in Visual studio code, set a breakpoint in thge ‘called_by_it.py’ file. Then select the ‘__main__.py’ file and click on the debug button on the left. You see it to the left of the ‘called_by_it.py’ file in the screenshot above.

You can step through the code, inspect variables etc, debug again and again until it works and then go back to ImageTank and hit reload.
You will notice the Output.dtbin file in the project folder when the program finishes running. Feel free to remove that, since it has no effect on what ImageTank shows.